
Alarm Configuration
Alarm Configuration

Alarm List and Management
The figure above shows the configuration window for a specific alarm group.
In this interface, each row represents an individual alarm definition.
- Add Alarm: To create a new alarm, click the New row at the bottom of the list, or use the Add button in the toolbar.
- Editing: Right-click any row to quickly access actions such as Delete, Copy or Paste.
- Sorting: If you have many alarms, click on column headers (e.g., Tag or Priority) to sort the list alphabetically or numerically.
The purpose and configuration details of each column (parameter) in this window are explained in the table below.
| Parameter | Description |
| No | Automatically assigned index number for each row. |
| Tag | The main tag whose value is monitored for the alarm condition. |
| Displayed Tag | Determines how the alarm will appear on the operator screen and which value will be monitored. When the alarm occurs, the current value of this tag is shown in the Value column of the AlarmView during Runtime. |
| Bitwise | Enables triggering based on a specific bit rather than the entire value. (Cannot be used with DATE, TIME, DATETIME, STRING types.) |
| Bit | Specifies which bit will be monitored (e.g., bit 0, bit 1). |
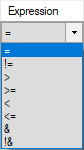
| Expression | Defines the logical operator used for the alarm condition. |
| Set | The target value to compare against. The value must be compatible with the selected Tag’s data type. Constant values must be written in double quotes, e.g., “true”, “false”, “128”, “65765”. |
| Displayed Set | Determines the value shown to the operator for this alarm. When active, this value is displayed in the Set Value column in AlarmView. |
| Hysteresis | A tolerance used to prevent the alarm from rapidly switching on and off at the threshold. |
| Enable | Determines whether the alarm is active. |
| Message | The description text displayed to the operator in the AlarmView when the alarm occurs. |
| Priority | Alarm priority level. A value between 0 and 65,535 can be entered. (0 = highest priority, 65,535 = lowest) |
| Active Color | Color displayed when the alarm is active. |
| Seen Color | Color displayed after the operator has acknowledged or viewed the alarm. |
| Normal Color | Color displayed when the system is in a normal state. |
| Acknowledge | Indicates whether the operator must confirm that the alarm has been seen. |
| Beep | Specifies whether an audible warning will be triggered when the alarm occurs. |
| Start Function | Function executed when the alarm is triggered. (See the Functions section for details.) |
| End Function | Function executed when the alarm ends. (See the Functions section for details.) |
| Comment | A note or description related to the alarm. |
Parameter Details
Expression
- The logical expression that triggers the alarm.
- Tag > 80 → generates an alarm when temperature exceeds 80.
Hysteresis
A tolerance value used to prevent the alarm from triggering repeatedly due to small fluctuations.
Example:
A condition is defined as: Alarm becomes active when _Tag_1 > 10.
If Hysteresis = 5:
- Alarm activates when _Tag_1 value exceeds 10.
- Alarm resets only when _Tag_1 drops below 10 – 5 = 5.
Result:
This prevents the alarm from turning off and on repeatedly near the threshold, improving stability in noisy or fluctuating signals.

Enable
- Determines whether the alarm is active.
- Clicking the field opens the Compare Dialog, where a condition can be defined.
- After confirming, the Conditions Dialog appears, allowing multiple Enable conditions.
- Any valid condition is sufficient for the alarm to become active.
Tip: If the alarm should always remain active, leave this field empty.
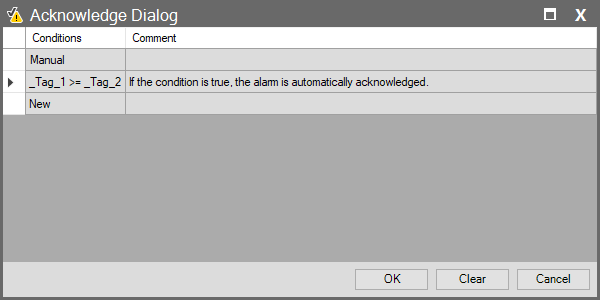
Acknowledge
- Indicates that the operator has viewed and acknowledged the alarm.
- Acknowledging an alarm does not end the alarm condition; it only confirms that the operator has seen it.
- There are two types of acknowledgment:
- Manual
- The operator must press a button to acknowledge the alarm. Alternatively, acknowledgment can occur automatically if the conditions defined in the Acknowledge Dialog are met.
- Auto
- When the alarm condition returns to normal, the system automatically marks the alarm as Acknowledged (Ack). The operator does not need to take any action. In this case, the Ack Time and End Time are identical.
